
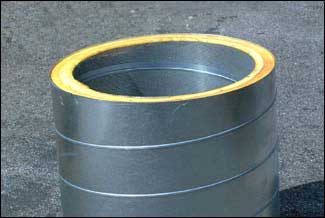
Installation
Designed with the end user in mind, the DuraFlange has many features to speed up the installation process. A pocket has been formed at the base of the flange to allow for the addition of caulking material before inserting inside the pipe. This pocket ensures an airtight seal from both the inside and outside of the connection. The Dura Flange connector is joined and installed with sheet metal screws. Starting holes have been punched in the flange to simplify the installation of the screws.
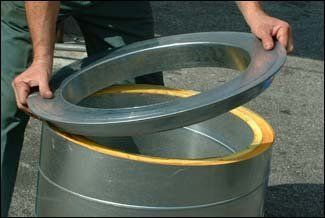
Step 1
At an angle gently slid the flange on to the Spiro duct, make sure to overlap the flange inner wall before the Spiro duct inner wall.
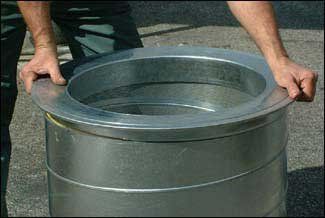
Step 2
Once the flange inner wall is set inside the Spiro duct, place the rest of the flange in the same manner.
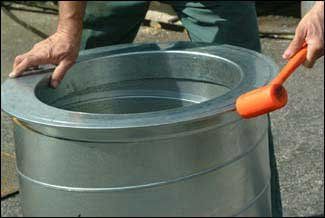
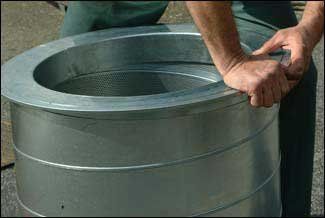
Step 3
Use the rubber hammer to nock the flange from the side to sit in inside the outer wall of the flange.
Step 4
Make sure that the flange is sitting inside the outer wall of the Spiro duct. Then gently ease the rest of the flange in.
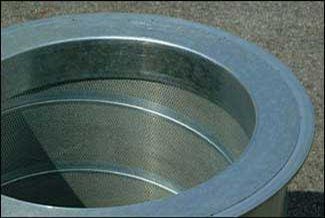
Complete
Note from Step 2, the flange inner wall is sitting inside the inner wall of the Spiro duct.
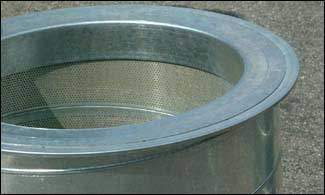
Complete
Note from Step 3, the flange outer wall is sitting inside the outer wall of the Spiro duct.
| Round | Oval | Custom |
|---|---|---|
| 10'' to 20'' - All Sizes 22'' to 80'' - Even Sizes | Minor Axis 10'' to 44'' -Even Sizes | 10'' to 44'' Even Sizes Major Axis 20'' to 120'' |
Custom Sizes available on request